Rest Service With Intel Galileo and XDK from Start to Finish
In this tutorial I’m going to build a node.js rest web service server and client in the IoT platform Intel Galileo gen 2. I realized that I needed a “physical” way to check if some services are performing good or bad in the network. This is a little but working example that could be useful if you want to see real physical alerts based on some good or bad service behaviours. Some examples are: a software factory want to see green or red lights in a room when an integration test has failed or not, or a devops guy wants to know if some important services (e.g. service discovery service in a microservice architecture) are up or down, and so on…
Preliminary Steps:
I’ll use a basic service template from the Dropwizard tutorial. I updated the demo template to use gradle instead of maven. You can clone or fork it from this repo: https://github.com/dinolupo/dropwizard-gradle-onejar-template.git
In this tutorial I’m going to use Intel XDK IoT Edition IDE installed on OSX Yosemite. I’ll be very fast on the XDK download and setup with the board, so, if you want to go slow on that, follow the articles in the reference section at the bottom.
Register inside a tool for an XDK account if you don’t have any.
This tutorial needs an updated Yocto Linux meta distribution running from a microSD card that must be plugged into the board.
You need to download the latest version of the Yocto boot image iot-devkit-latest-mmcblkp0.direct.bz2, decompress the downloaded image file, and write the extracted image iot-devkit-latest-mmcblkp0.direct to the microSD card.
Latest compressed boot image
Pay attention to this procedure, because otherwise you’ll risk to delete all of your content on another drive.
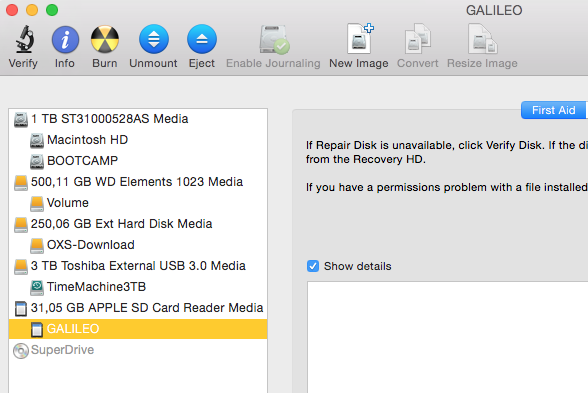
Once you have inserted your micro SD card into your host with a USB or SD adapter (I’m using an SD adapter here), take note of the name of your partition using Disk Utility. My previous micro SD was formatted with GALILEO label as shown in the following image:
Opening a terminal, you can see the same information plus the crucial one: what’s the block device associated to the SD, using the mount command as follows:

Note that the command will output the mounted partitions, so for example in my case the SD card has 1 partition “s1” with composite device name disk5s1. So cutting the partition from the mounted device name gives you the device (disk) name disk5.
Complete command list:
1) Executing mount
$ mount
/dev/disk0s2 on / (hfs, local, journaled)
devfs on /dev (devfs, local, nobrowse)
map -hosts on /net (autofs, nosuid, automounted, nobrowse)
map auto_home on /home (autofs, automounted, nobrowse)
/dev/disk0s4 on /Volumes/BOOTCAMP (ntfs, local, read-only, noowners)
/dev/disk2s2 on /Volumes/OXS-Download (hfs, local, nodev, nosuid, journaled, noowners)
/dev/disk1s2 on /Volumes/Volume (ntfs, local, nodev, nosuid, read-only, noowners)
/dev/disk3s1 on /Volumes/TimeMachine3TB (hfs, local, nodev, nosuid, journaled)
/dev/disk5s1 on /Volumes/GALILEO (msdos, local, nodev, nosuid, noowners)
2) Take note of your mounted partition on SD card, in my example is /dev/disk5s1 so the device name is /dev/disk5
3) Unmount the partition /dev/disk5s1:
% sudo diskutil umount /dev/disk5s1
Volume GALILEO on disk5s1 unmounted
4) Be careful with the commands to avoid erasing the wrong device (such as your hard drive!):
[08:34:07]$ sudo dd if=iot-devkit-latest-mmcblkp0.direct of=/dev/disk5 bs=8m
131+1 records in
131+1 records out
1103102976 bytes transferred in 3914.000749 secs (281835 bytes/sec)
[09:40:06]$
As you can see it takes very long to write the image on the microSD card (more than an hour on my 32GB microSD card). So wait until the command finishes and the terminal displays the prompt again, before closing the terminal window.
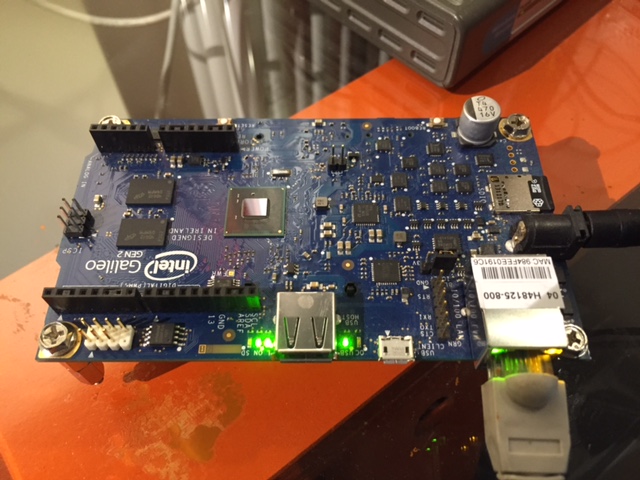
Put the SD card into Galileo, then plug the Ethernet cable and power on the device. Wait about a minute, until the SD led stops blinking:
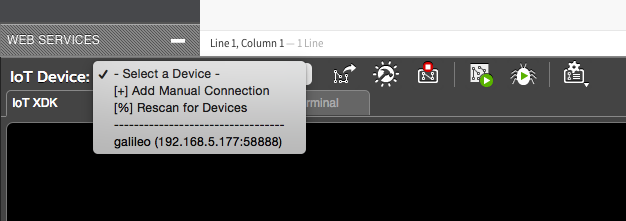
Open XDK IDE and select your device:
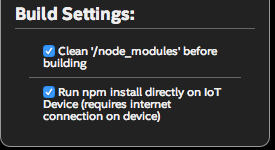
Set the following options on the IDE:
Node.js code and explanation:
1
2
3
4
5
6
7
8
9
10
11
12
13
14
15
16
17
18
19
20
21
22
23
24
25
26
27
28
29
30
31
32
33
34
35
36
37
38
39
40
41
42
43
44
45
46
47
48
49
50
51
52
53
54
55
56
57
58
59
60
61
62
63
64
65
66
67
68
69
70
71
72
73
74
75
76
77
78
// Require the HTTP library
var http = require("http");
// Require the MRAA library
var mraa = require('mraa');

// Print the MRAA library version to the IDE console
console.log('MRAA Library Version: ' + mraa.getVersion());

// GREEN LED
var serviceUpLed = new mraa.Gpio(13);
serviceUpLed.dir(mraa.DIR_OUT);

// RED LED
var serviceDownLed = new mraa.Gpio(8);
serviceDownLed.dir(mraa.DIR_OUT);

// YELLOW LED
var serviceHealthWarning = new mraa.Gpio(12);
serviceHealthWarning.dir(mraa.DIR_OUT);

// initialize all led
serviceUpLed.write(0);
serviceDownLed.write(0);
serviceHealthWarningLed.write(0);

// set your service hostname, port and path
var options = {
    hostname: '192.168.5.131',
    port: 8080,
    path: '/hello-world',
    headers: {
            'Content-Type': 'application/x-www-form-urlencoded',
            /*'charset':'UTF-8'*/
    },
    //method: 'GET'
};

// request callback, open GREEN led if HTTP 200 - OK
var callback = function(res) {
    res.on('data', function (data) {
        console.log("Got response: " + res.statusCode);
        console.log(data);
        if (res.statusCode==200) {
            serviceUpLed.write(1);
            serviceDownLed.write(0);
        }
    });
}

// call the request every 5 seconds. Set timeout with callback to 1 second to open YELLOW led in case of slow response.
var interval = setInterval(function() {
    serviceHealthWarningLed.write(0);
    var req = http.get(options, callback);

    // if there is an error, open the RED led
    req.on('error', function (err) {
        console.log("Got ERROR: " + err.message);
            serviceUpLed.write(0);
            serviceDownLed.write(1);
    });

    // if request timeout is passed, open the YELLOW led
    req.setTimeout(1000, function() {
        console.log("---> Request Timeout");
            serviceHealthWarningLed.write(1);
    });
}, 5000);

// if you want to run a server, uncomment the following. It could be useful to adjust timeouts or to switch watched services on the fly
//var server = http.createServer(function(request, response) {
//
//    if ((request.method == 'GET') && (request.url = '/someservice')) {
// 		// do something useful
//    }
// });
// Start listening at port 1337
// server.listen(1337);
// console.log("Server is listening at port 1337");
Remember to save, compile and upload every time you do a change to the code:
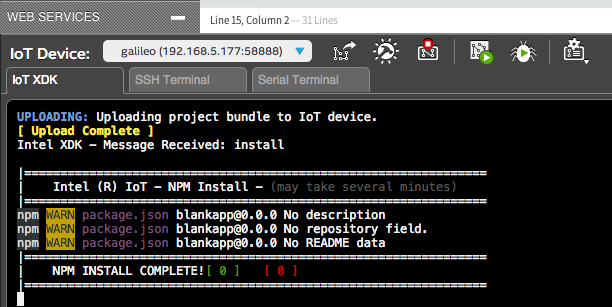
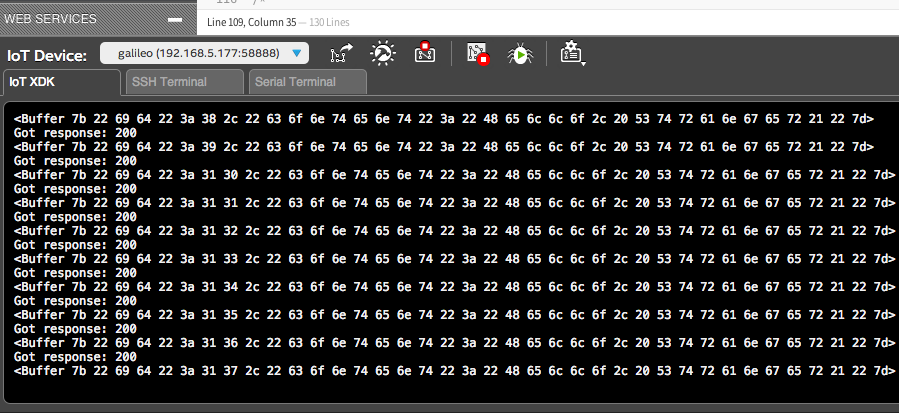
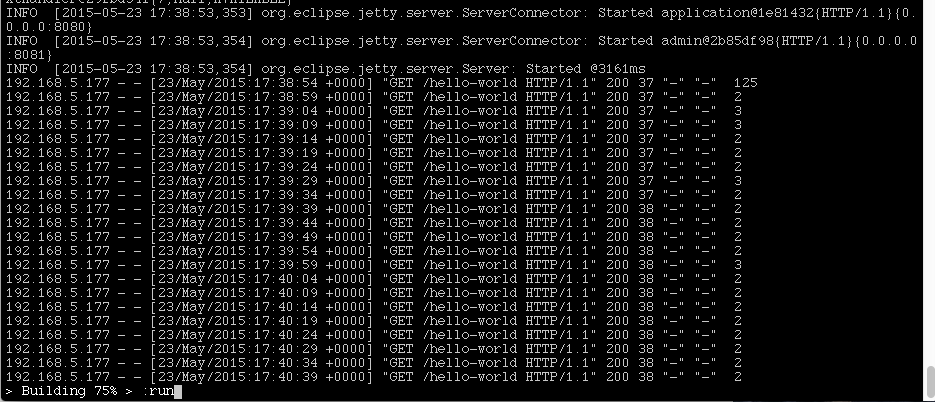
Now start the Dropwizard service with gradle run and run the node.js program from the IDE, you will see the following:
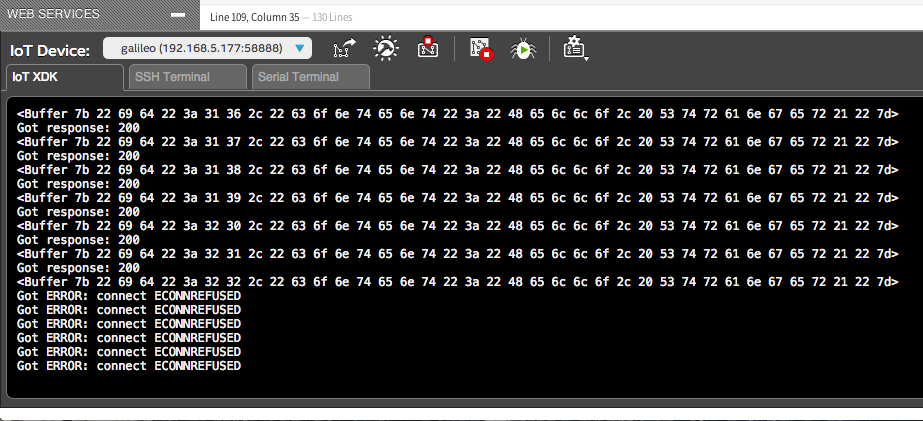
IDE Console service calls:
OSX Terminal calls coming from Galileo:
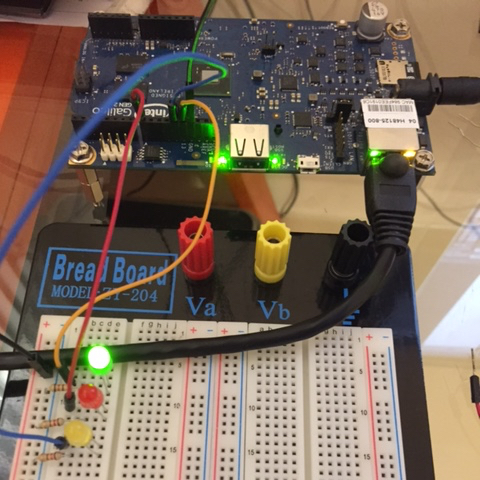
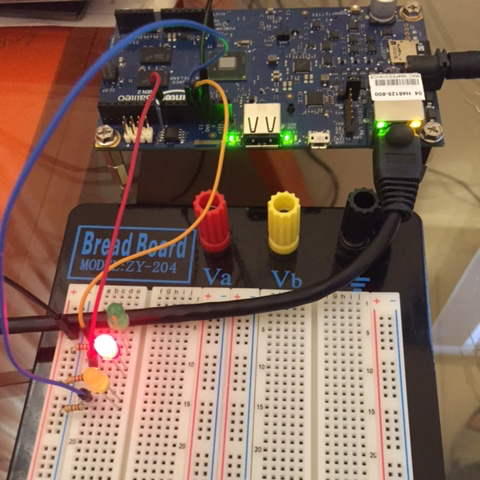
Green Led On:
From the OSX Terminal where Dropwizard is running, close it pressing <CTRL>-C without closing the running node.js program on XDK (Galileo), you will see:
IDE Console failed calls:
Red Led On:
Service Performance Test
Modify the Java service adding a Thread.sleep(2000) instruction, just the necessary time to trigger the configured timeout on the Galileo, here is the full code sample:
package info.dinolupo.resource;

import info.dinolupo.core.Saying;

import com.google.common.base.Optional;
import com.codahale.metrics.annotation.Timed;

import javax.ws.rs.GET;
import javax.ws.rs.Path;
import javax.ws.rs.Produces;
import javax.ws.rs.QueryParam;
import javax.ws.rs.core.MediaType;

import java.util.concurrent.atomic.AtomicLong;

@Path("/hello-world")
@Produces(MediaType.APPLICATION_JSON)
public class HelloWorldResource {
    private final String template;
    private final String defaultName;
    private final AtomicLong counter;

    public HelloWorldResource(String template, String defaultName) {
        this.template = template;
        this.defaultName = defaultName;
        this.counter = new AtomicLong();
    }

    @GET
    @Timed
    public Saying sayHello(@QueryParam("name") Optional<String> name) {
        final String value = String.format(template, name.or(defaultName));
        try {
		Thread.sleep(2000);
	} catch (InterruptedException e) {
		e.printStackTrace();
	}
        return new Saying(counter.incrementAndGet(), value);
    }
}
Save the file and run again gradle run, you will see the following:
IDE Console Timeout logs:
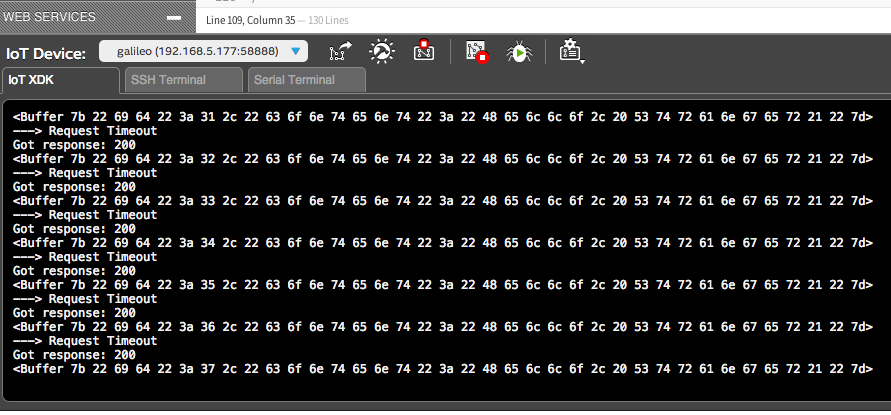
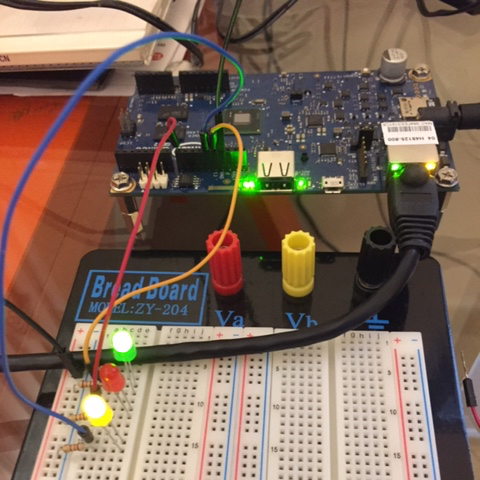
Green and Yellow leds are on:
This is only an example, you’ll need electrical skills to connect high voltage lamps. Thanks for reading.